Recipe Summary
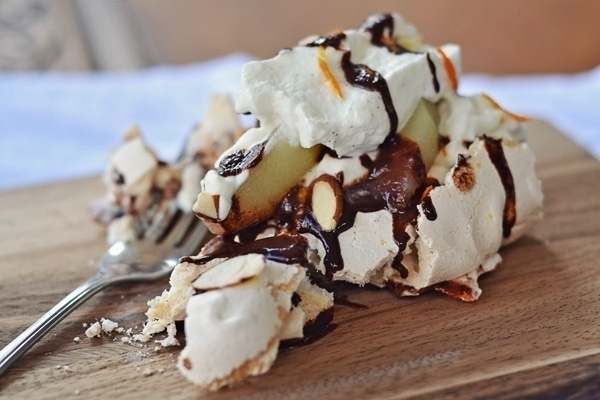
Crunchy, sweet and loaded with yumminess, Pear and Chocolate Pavlova!
0gFat
0gProtein

Love Meringue? Gorgeous Whipped Cream? Chocolate????? Then this one’s for you …
Pear and Chocolate Pavlova!
I use to be scared of making Meringue! But then I just decided it was time to get over that hurdle in my life and face my fear. So I learned to make Meringues and guess what, it’s nothing to be scared of!!!
It’s so much easier than ever I thought it would be and the taste is sweet and crunchy and I really love it! (I’m still working on enjoying the fluffy Meringue that goes on pies, I usually take that layer off and pass it over to my mom … lol).
For now I’ll stick to the crunchy, sweet and delicious Meringues that make a beautiful dessert on it’s own or as a base for more tasty bits of fruit, chocolate or nuts and of course CREAM!
Pavlova is a dessert that started Down Under in the 1920’s. Apparently after the ballet dancer Anna Pavlova toured Australia and New Zealand, this dessert was created in her honor.
Did I mention that there’s fluffy, sweet CREAM involved?!?
Try pimping it up a bit with whatever seasonal fresh fruits you have on hand. In this recipe I’m going with canned (yes, indeed I am) Pears … it’s called a time saver shortcut and something that you can always have on hand in case you are unable to find quality fresh fruit.
Prepare yourself, it’s a delectable dessert that is easy to make and impressive to your dinner guest. You can also make the Meringue base up to 2 days in advance as long as you keep it in an airtight container. So for those of you that love time savers, and who doesn’t these days, you have OPTIONS – You can do this!
Ready to impress? Give this Pear and Chocolate Pavlova a go and ENJOY!
Pear and Chocolate Pavlova
Ingredients
Method
- Preheat oven to 300F. Line a baking sheet with parchment paper.
- In a very clean and dry bowl, whisk your egg whites with mixer until stiff peaks start to form.
- Slowly start adding the Sugar and Salt and continue to whisk for another 5 - 8 minutes until you have a glossy mixture with firm peaks. If you pinch a bit of the mixture between your fingers and it still feels grainy, then continue to mix for another couple of minutes until it feels smooth.
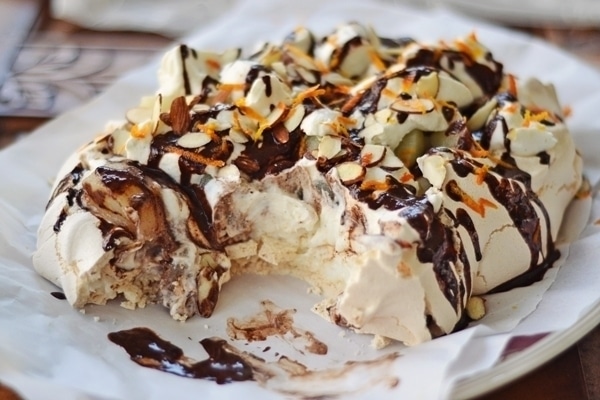
- On a prepared parchment lined baking sheet, spoon out Meringue mixture and spread around to be about 2 - 3 inches thick. Using the back of the spoon or rubber spatula, "swirl" the top to give it some peaks.
- Bake in the preheated 300F oven and bake for 45 minutes - 1 hour. The outside will crack and the inside will be sticky and slightly soft.
- Remove from oven and cool.
- In a small saucepan, melt the Chocolate with the reserved pear syrup and 1 teaspoon ground ginger until smooth and glossy. Let cool slightly.
- In a large bowl, using a mixer, beat the Whipping Cream, Vanilla seeds and sifted Powdered Sugar together until soft peaks form. Do not over mix or you will end up with something more like butter.
- In a dry skillet, warm the Almond slivers. Set Aside.
- Cut the Pear Halves into 3 - 4 slices per half.
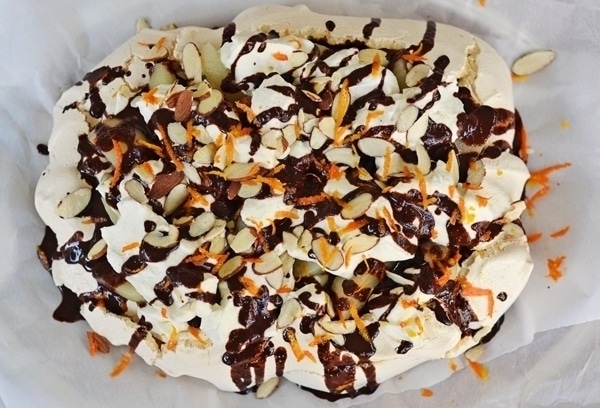
- Place the cool Meringue on your serving plate and top with half the Whipped Cream and half the Chocolate.
- Add the pears and top off with the Almond slivers and the remaining Whipped Cream and Chocolate. Grate over the Orange Zest.
- Serve and Enjoy!
Tried this recipe?
Let us know how it was!
7-Day Email Series
Seven dinners worth getting undressed for.
One lands in your inbox every morning for a week — plus the side and the drink I’d pour with it. Free.
No chef’s journey. No weird ingredients. Unsubscribe whenever.