Recipe Summary
This Garlic Dill Pickles recipe is ideal to make for all dill pickle lovers, perfect for sharing with friends and family, as an addition to cookouts, picnics, and more.
Making homemade dill pickles is a great way to enjoy the delicious crunch of fresh pickles any time. But canning pickles can be a difficult and time-consuming process. Refrigerator pickles are a simple option for anyone who loves homemade pickles but doesn’t want to put in all the hard work.
This recipe for garlic dill pickles is quick to make and packed with flavor.
You’re going to love the zesty flavor in these fresh pickles. But what you’ll love even more is how easy this recipe is to make!
You just need a handful of ingredients and a few minutes of your time to make your own pickles at home with ease.
What You’ll Need to Make Refrigerator Pickles:
- Water
- White vinegar
- Pickling salt
- Pickling spice blend
- Garlic cloves
- Fresh dill
- Bay leaves
- Pickling cucumbers
- Glass jars with lids
How to Make Garlic Dill Pickles:
Step One:
- Prepare your cucumbers by cleaning and slicing them, if desired. The pickles can be sliced into chips or spears. Or leave the cucumbers whole for full-size pickles.
Step Two:
- Prepare a brine for your cucumbers by heating water, vinegar, and pickling salt in a saucepan over high heat. Bring the mixture to a boil, stirring occasionally, and cook for three to five minutes.
- When the salt has fully dissolved, remove the pan from heat and allow the liquid to cool for around 10 minutes.
Step Three:
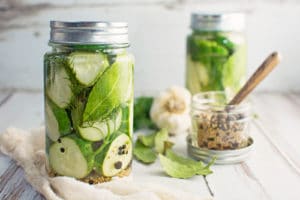
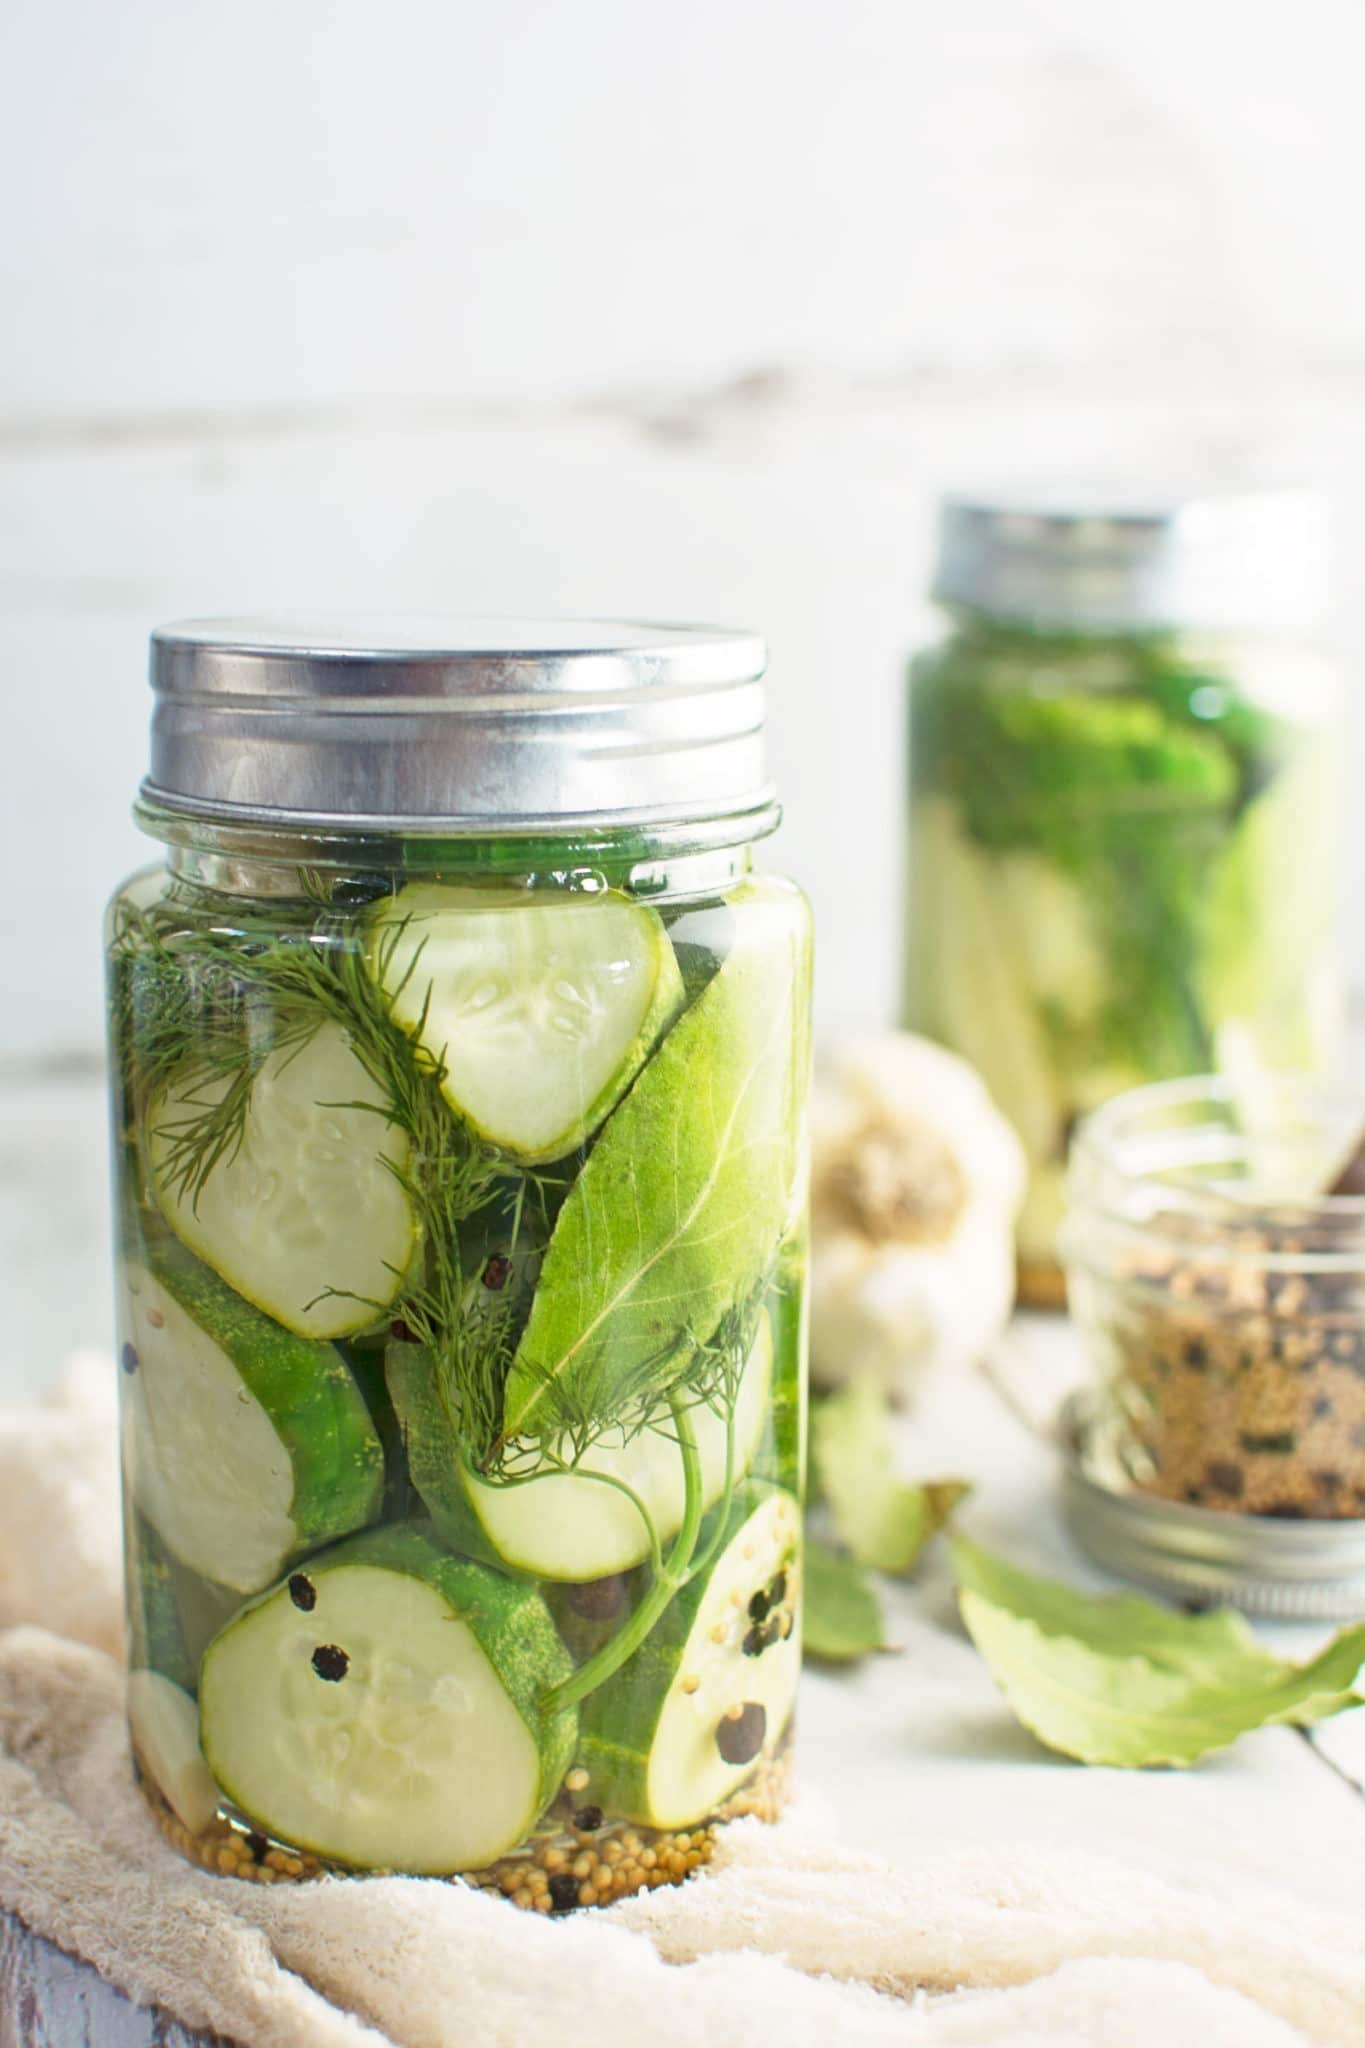
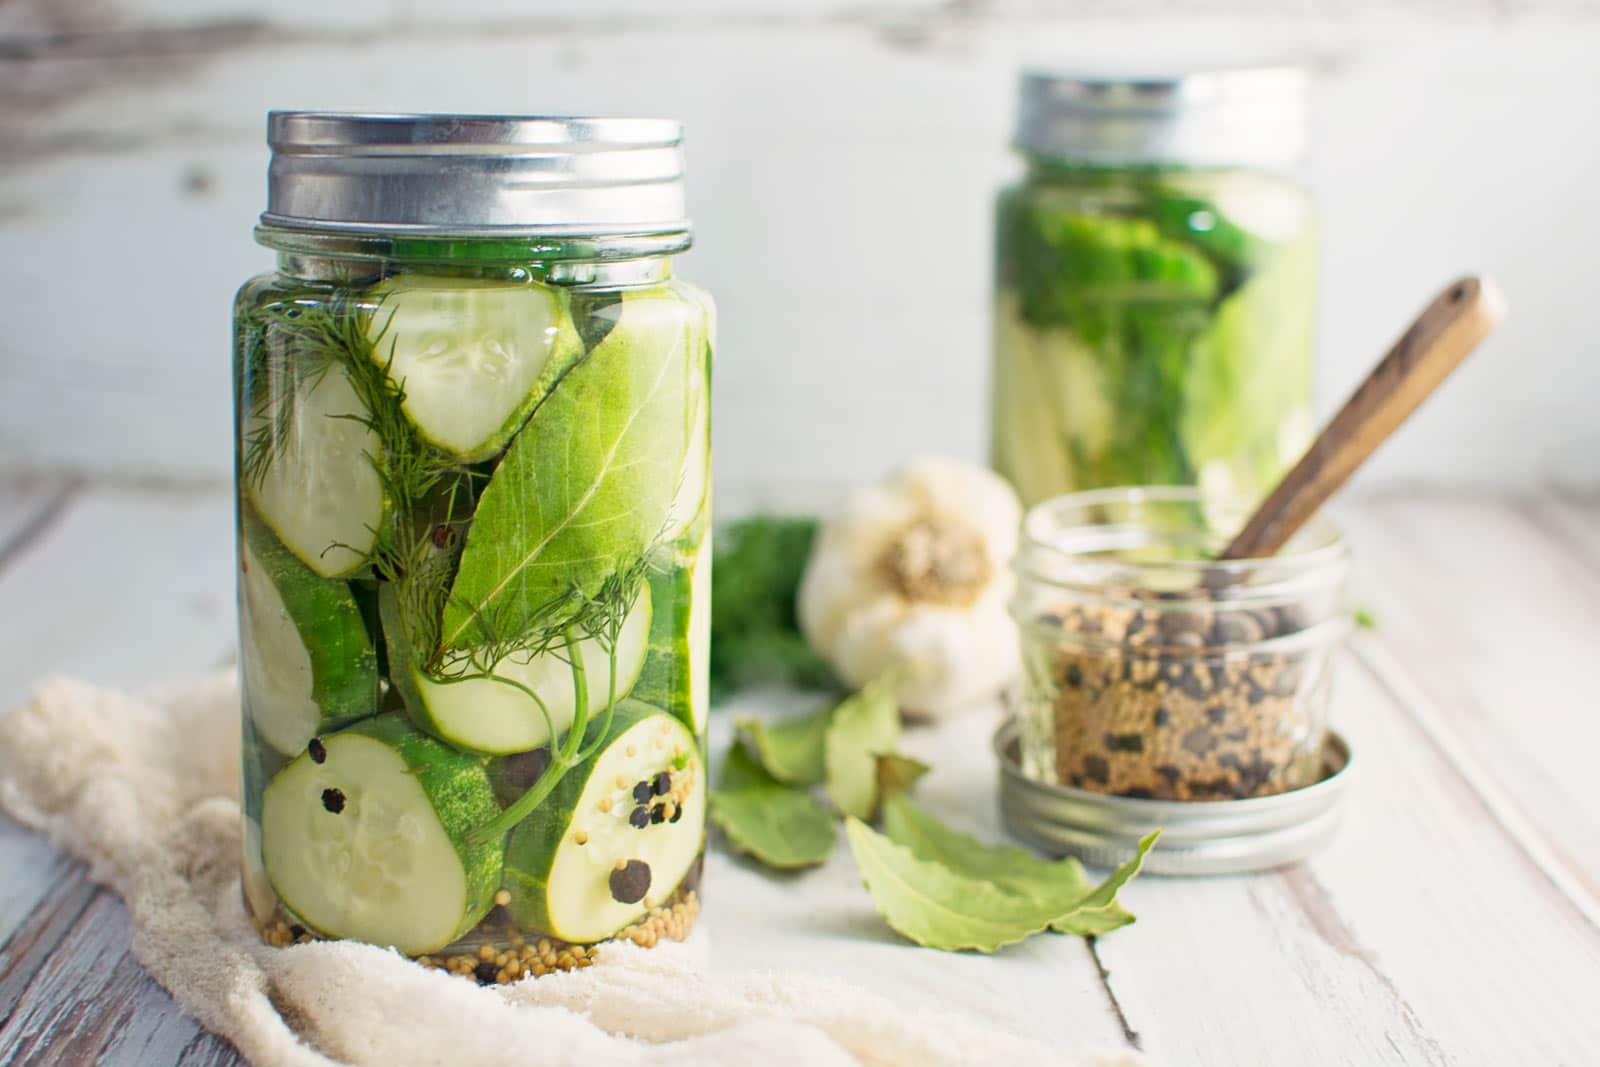
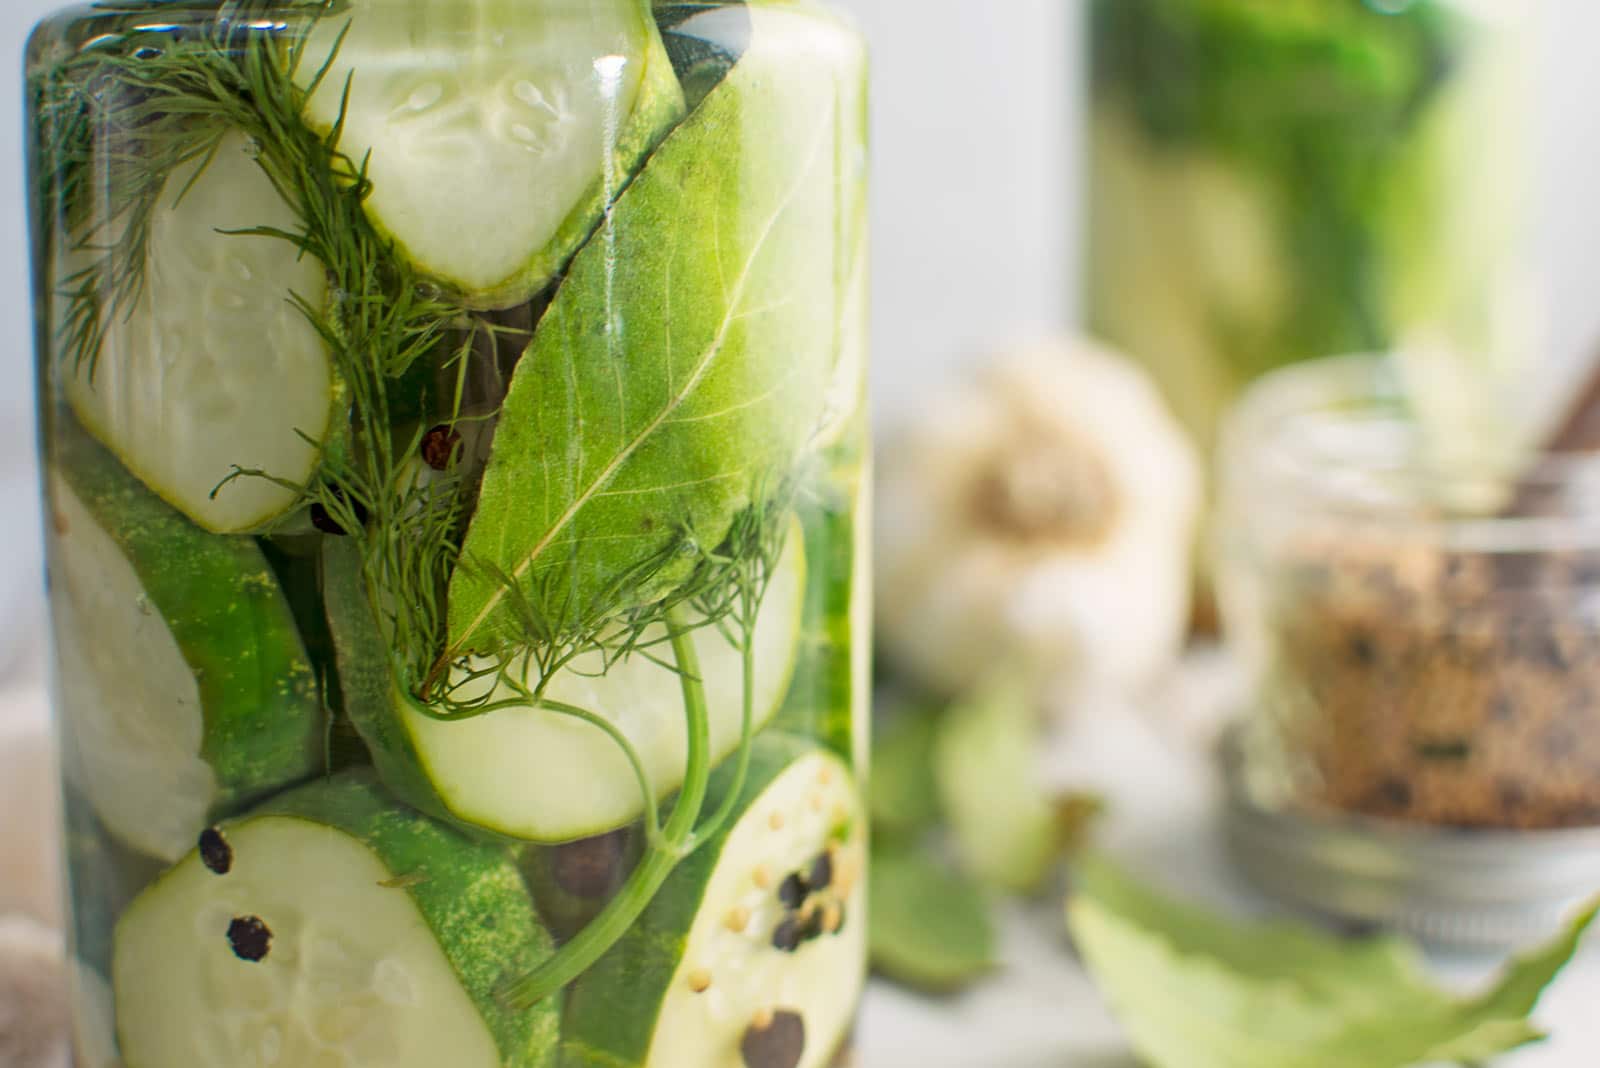
- Fill the jars by placing the pickling spice blend and garlic cloves in the bottom of the jar.
- Top the seasonings with the cucumbers, then place the sprigs of dill and bay leaf along the sides of the cucumber slices.
Step Four:
- Pour the vinegar mixture over the top of all the ingredients in the jar, leaving around ¼ inch of space around the top of the jar. Place the lid on the jars to seal them.
- The jars can then be canned using a hot water bath or stored in the refrigerator.
Tips and Tricks
You’ll love how simple this garlic dill pickle recipe is to make! And with the help of these tips and tricks, you can enjoy freshly made pickles all year long.
- Use smaller cucumbers for a bigger crunch. Small cucumbers are the best choice when making refrigerator pickles. Cucumbers that are three to four inches long are the best option. Larger pickles can also be used, but the pickles won’t be as crunchy as they are when using smaller varieties.
- Cut to your preference. You can cut the cucumbers either into spears, long thin slices, thick 1 – 2 inch chunks, or make them into those fun little pickle chips that are perfect for topping off your hamburgers. Of course, you can also leave the garlic dill pickles whole.
- Pint-sized jars help the pickles last longer. Unless your family enjoys eating tons of pickles throughout the month, I suggest using smaller pint-sized jars to ensure your pickles don’t go bad after the jars are opened. Smaller pint-sized jars are also the best choice when using the hot bath processing method to preserve your jars for longer storage.
- Don’t forget to let your brine cool. Taking the time to allow your brine to cool after boiling is essential. If you add hot brine to the jars with your cucumbers, you may cook the cucumbers in the jar. This will cause the pickles to become soft and soggy, which is definitely something you don’t want in a homemade garlic dill pickle!
- Make spicy pickles by adding dried chili peppers. Place one dried hot chili pepper in each jar to add a spicy kick to each of your pickle batches.
How Long do Refrigerator Pickles Last?
After making your pickles, you can store them in the refrigerator for four to six weeks. And if you decide to can the pickles using a hot bath, the pickles can be stored at room temperature for up to six months. Once you open your canned pickle jars, store them in the refrigerator.
How Long do Pickles Need to Cure?
The length of curing time depends on the type of pickle you’re making. When using the refrigerator method, it’s a good idea to let your pickles cure for at least three days in the fridge before eating them.
And if you choose to use the hot bath canning method, it’s best to leave your pickles to cure for around three weeks. Either way, this curing time will give your pickles time to soak in the brine and all that garlic dill flavor.
Do You Have to Boil the Brine for Refrigerator Pickles?
When making a brine for pickles, boiling is an essential step. Taking the time to bring your vinegar and water to a boil will help all the flavors meld better.
It will also give your salt a chance to dissolve in the liquid, which will help keep your pickles from becoming overly salty as they soak. And while boiling your brine is an important step in making refrigerator pickles, it’s equally important to let that brine rest before pouring it into your pickle jars.
Giving your vinegar mixture time to cool before adding it to the jars with your cucumbers will prevent those pickles from becoming overcooked and soggy while they soak.
Make your own easy refrigerator garlic dill pickles recipe, they’re amazing!
For the flavor and beauty of seeing these jars sitting on the shelf, I added fresh dill sprigs plus a bay leaf to each jar. Leaving the bay leaf whole is best, that’s so you don’t have those awkward tiny bits sneaking in and stabbing your mouth. Also adding fresh, whole garlic cloves adds just the right amount of flavor so that it doesn’t overpower those pickles.
What can I use the leftover pickle juice for?
I love to use it to marinate my chicken if I’m making chicken tenders or strips, the juice is brilliant for tenderizing meats. For other great ideas, check this article out!
If you want to know more about the hot water bath for canning and preserving, check out Fresh Preserving.
Other Great Recipes to Try:
- Small batch Pepper Peach Jam
- Easy to make and spicy, Dilly Beans
- Peach and Toasted Almond Jam
How to make Garlic Dill Pickles?
How to Make Garlic Dill Pickles
Ingredients
Method
- In a saucepan over high heat, bring the water, vinegar, and pickling salt to a boil, stirring occasionally for about 3 – 5 minutes and the salt has fully dissolved. Cool for about 8 – 10 minutes.
- In each wide-mouth pint jar, first, add the pickling spice blend, 3 garlic cloves, followed by the cucumbers sliced the way you prefer or left whole. Down the sides, as you are adding the cucumbers, put in 2 – 3 sprigs of fresh dill and 1 bay leaf.
- Pour the vinegar mixture over the cucumbers, leaving a space of about 1/4 inch from the top. Seal with a lid and if proceeding with the hot water bath for canning, do that step now, otherwise place the sealed jars in the refrigerator and try to wait for 2 – 3 days to allow them to cure before eating.
Nutrition
Notes
- You can also add dried hot chili pepper to each jar for Spicy Garlic Dill Pickles.
- Keeps for up to 4 – 6 weeks in the fridge without using the hot water bath or up to 6 months with the hot water bath process.
- You can also use any variety of pickles available, but the bigger they are the less crunchy they tend to be.
Tried this recipe?
Let us know how it was!UPDATED: March 23, 2021
7-Day Email Series
Seven dinners worth getting undressed for.
One lands in your inbox every morning for a week — plus the side and the drink I’d pour with it. Free.
No chef’s journey. No weird ingredients. Unsubscribe whenever.

This looks like a great recipe and I will be making this weekend. Can you also freeze this instead of canning?
Hi Libby! I hope you enjoy them…I’ve never tried freezing them, they don’t last long here. If you do, be mindful that they will only last about a week after defrosting. So maybe try it in small batches. Let me know if you and how they turn out. 🙂
Man, is it really that easy? Why have I never done this before? I could eat pickles with every meal! Thanks for the recipe!
They are ridiculously easy to make, hope you get a chance to try making them soon!
Yes to all the pickles! Homemade pickles are one of my favorite summertime treats. I’ve never actually made them at home, but last summer we grew a ton of cucumbers. I’ll have to give this a go if we have the same luck this summer!
If you grow your own cucumbers, then you should enjoy making these pickles! Here’s to a brilliant harvest this summer!
I love homemade pickles and these look so good! I really like how easy they are to make as well!
Thank you Jennifer, hope you get a chance to make your own soon!
These photos are gorgeous! And I totally need to try this 🙂
Thank you so much, hope you get an opportunity to make your own soon!
This looks incredibly tasty! I can’t wait to try your recipe! I have never made homemade pickles before!
Hope you enjoy them Sara! Thank you 🙂
This looks like a great recipe! And they look so pretty in the jars with the fresh dill, bay leaf and spices. I think it could be a really fun and unique gift for anyone who loves pickles.
Thank you Shannon! And yes, they do make brilliant gifts as well!
I love pickles so so much! I know they are super easy to make at home, but for some reason I don’t do it. Thank you for the inspiration!!
Thank you Maryea! Hope you get a chance to try your hand at making your own soon!
I LOVE making pickled veggies, and this combo sounds amazing. Thanks for this interesting post and recipe.
Thank you Amelie!
i love pickled veggies and fruits,these clicks are making me drool!
Aww thank you! 🙂
Loving fermented foods right now!
OH my, so am I Kristina!
I tried to make pickles myself once, to have a Murphy’s law experience and haven’t been brave enough to try since. This recipe is so simple and manageable that I think this is the one to finally get me to try again! 🙂
Oh that’s funny, you’ll have to try again, these are worthy of another try!
The recipe instructions say add 2-3 sprigs of fresh thyme. Did you mean dill? Thanks for the recipe!
Oh my … yes, it is supposed to be dill. Thank you for catching that, it’s now updated, and I hope you enjoy!!!
This looks like a great recipe and I will be making this weekend. Can you also freeze this instead of canning?
Yes to all the pickles! Homemade pickles are one of my favorite summertime treats. I’ve never actually made them at home, but last summer we grew a ton of cucumbers. I’ll have to give this a go if we have the same luck this summer!
I love homemade pickles and these look so good! I really like how easy they are to make as well!
This looks incredibly tasty! I can’t wait to try your recipe! I have never made homemade pickles before!
I love pickles so so much! I know they are super easy to make at home, but for some reason I don’t do it. Thank you for the inspiration!!
I LOVE making pickled veggies, and this combo sounds amazing. Thanks for this interesting post and recipe.
Loving fermented foods right now!
I tried to make pickles myself once, to have a Murphy’s law experience and haven’t been brave enough to try since. This recipe is so simple and manageable that I think this is the one to finally get me to try again! 🙂
The recipe instructions say add 2-3 sprigs of fresh thyme. Did you mean dill? Thanks for the recipe!
Hi! I was wondering how long you process the jars in the hot water bath? I’m guessing 10-20 minutes (from other recipes I’ve tried. Thanks!
Hi Heather! Yes, the water bath is using is about 10 minutes, I try not to go to much over that as I don’t want to “cook” the pickles. Thank you for asking and enjoy!
Made a batch this last week and they turned out pretty well. Just a little salty. Is there a way to reduce that – I dare not mess with your recipe.
PS: Happy to share my own bread and butter pickle recipe.
If you prefer it less salty, you can decrease to only using about 2 tablespoons of the pickling salt which would be half the amount called for in the recipe. I hope this is more to your liking! 🙂
If I do a hot water bath, do they need to be refrigerated over the 6 months?
Hello Kimberly, when using the hot water bath method, they are shelf-stable for up to a year without refrigeration … if they last that long 🙂